Posts

Showing posts from March, 2023

Week 11: Final Mask

Image
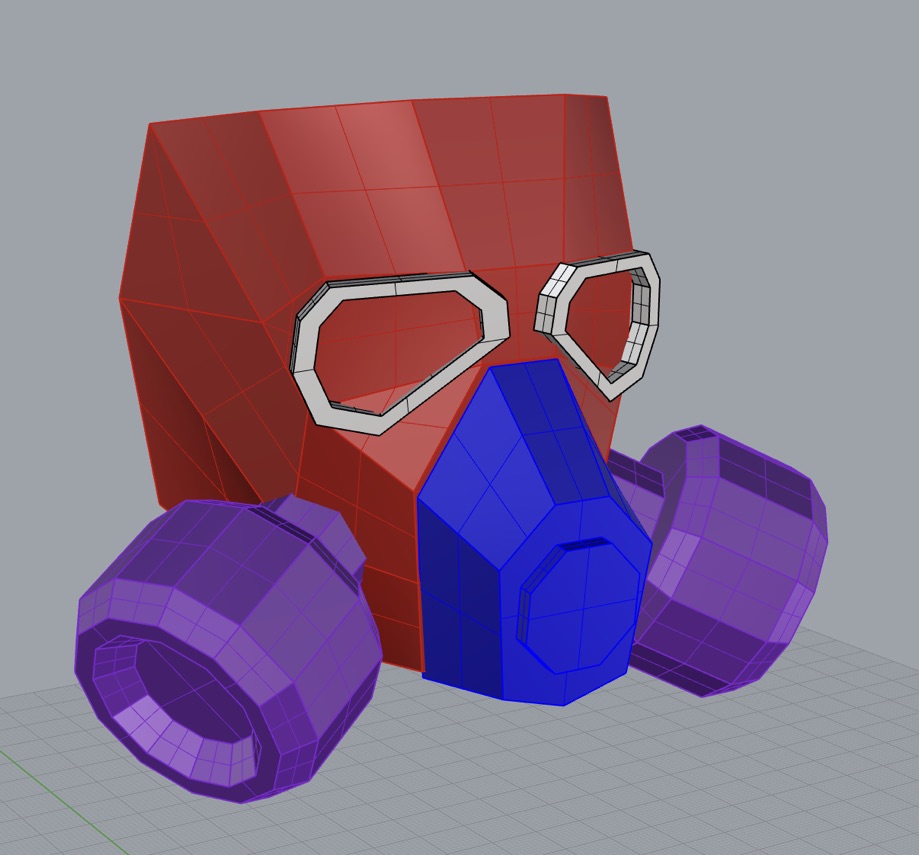
The Final Mask Far cleaner than before, the new mask fits the same, and has the added addition of patterns on the Chambers. At a glance, it seems as if only the chambers have changed. However upon inspection, you can clearly see the improvement in craft.  (Its in this image in particular, that I believe you can see the clear improvement from one model to the next.) When directly comparing to the old model, it's clear to see which is superior. It was an option for me to submit the first model, however when I looked at it, I knew I could do better. In the end, the decision to start over was the right choice. I feel far more satisfaction when looking at the new model compared to the old one.  Just one pass (and one bad hot glue burn) later, it feels like I've learned so much. It's incredible how much we've accomplished over the last semester, from opening a program I have never heard of, to using said program to model a mask that fits perfectly to my face. In the future, I...

Week 10: Tweaks and Improvements

Image
  Old mask, verses redesign  Improvements: - Flat Chambers - Smaller connectors - Thicker Eyepieces  After folding the entire mask in the right size and material, I learned a lot about paper-craft. How to fold, how to cut, and what folded easier than others are some aspects I can name. So when it came to the designs that gave me issues while folding, I went back into rhino and re-organized the unfolds by hand to make the process far less complicated.  It was possible to turn in my first pass, however after looking at it, I new I could do better. Thus, I began reworking and refolding my mask.  Old unfold verses new (Eye Piece) Old unfold verses new (Chambers) Old unfold verses new (Mask) Templates (Tabs were made by hand in the cutting process to speed up the process) New verses old chambers  New Eyepieces folded with tabs  New Mask with tabs  Process if the new mask by the end of week 10 To the average eye, it may seem almost identical to the orig...

Week 9: Prototype/Good copy first pass

Image
Although initially I wanted the green of the mask to be neon, this more desaturated sage green helps the pink stand out more. Things I've learned in the process of making this life-sized version: - The unroll template of the gas chambers is unnecessarily complicated, and can be easily reworked in rhino to make the folding process easier.  - The triangles on the chambers can be more symmetrical  -There is some visible glue, so scraping and covering it may be an option Other than these points, the mask came out very well. It's the right size, and does indeed look like my model. The only other thing that could improve it is just a little more care in making sure the glued pieces are cleanly put together  

Week 8: Papercraft progress

Image
This week, our class began to model our paper craft projects, and proceeded to create our first "thumbnail" model.  Due to its awkward shape, it was very hard to create the base of the mask (depicted in red). The solution I found for this, was to return to "Thingiverse" and retrieve a planar head. This served as a sort of mannequin, so I was able to visualize how it would look on a face. The mask was sculpted with the polyline tool, later using the "surface from 3 or more corner points" in order to create an object rather than a wireframe. The other aspects where all sculpted using the polyline tool, and "loft". Once complete, I used rhinos unroll function to flatten my papercraft for printing. Everything flattened fairly well, except for the filter chambers. The indent and beveled edges created a lot of planes, leading to severe overlap. In hopes of it still working, I took it apart and separated the pieces for print. Other than the chambers, on...