Week 8: Papercraft progress
This week, our class began to model our paper craft projects, and proceeded to create our first "thumbnail" model.
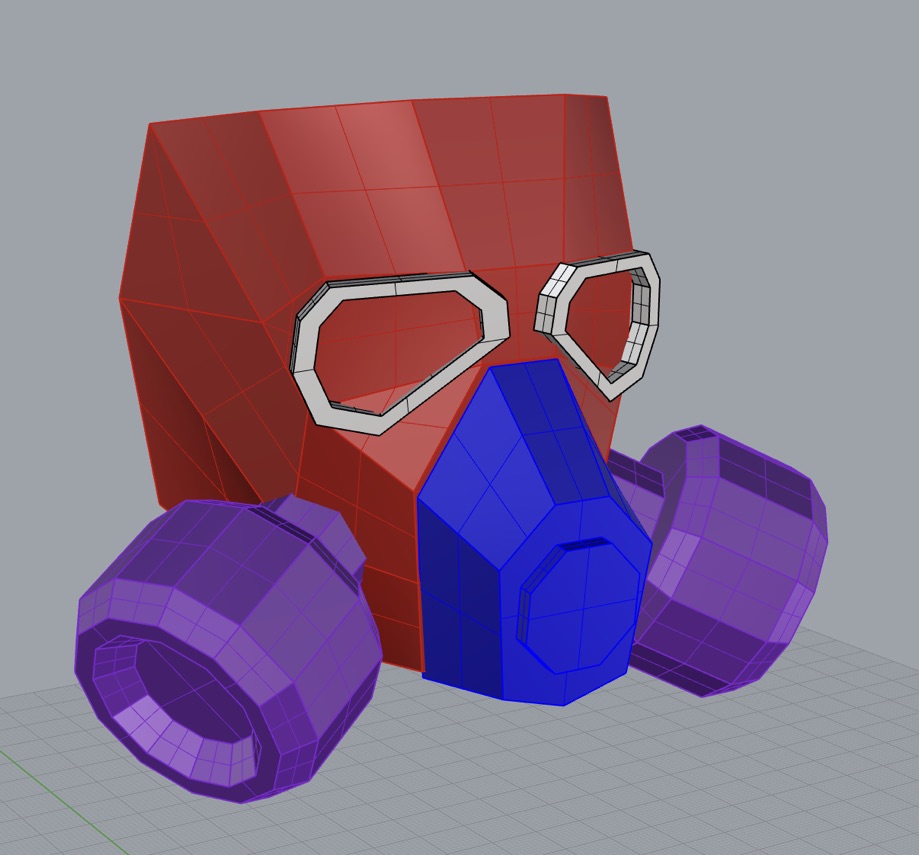
Due to its awkward shape, it was very hard to create the base of the mask (depicted in red). The solution I found for this, was to return to "Thingiverse" and retrieve a planar head. This served as a sort of mannequin, so I was able to visualize how it would look on a face. The mask was sculpted with the polyline tool, later using the "surface from 3 or more corner points" in order to create an object rather than a wireframe. The other aspects where all sculpted using the polyline tool, and "loft".
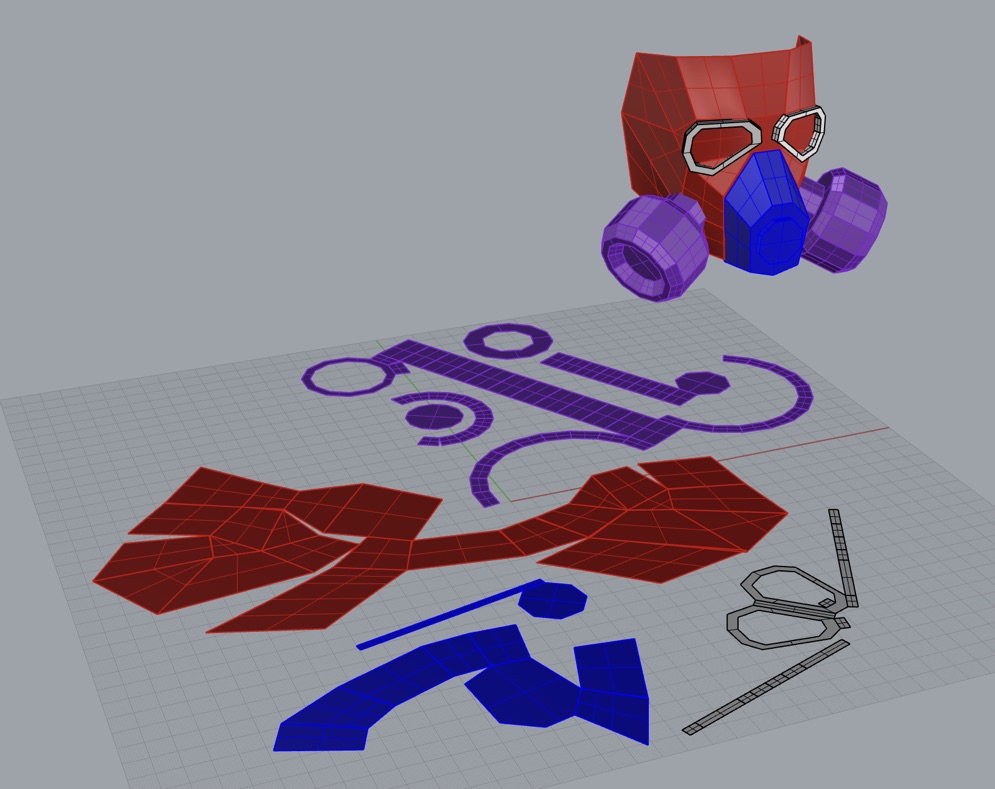
Once complete, I used rhinos unroll function to flatten my papercraft for printing. Everything flattened fairly well, except for the filter chambers. The indent and beveled edges created a lot of planes, leading to severe overlap. In hopes of it still working, I took it apart and separated the pieces for print. Other than the chambers, only the eye piece had overlap, but it was an easy fix.
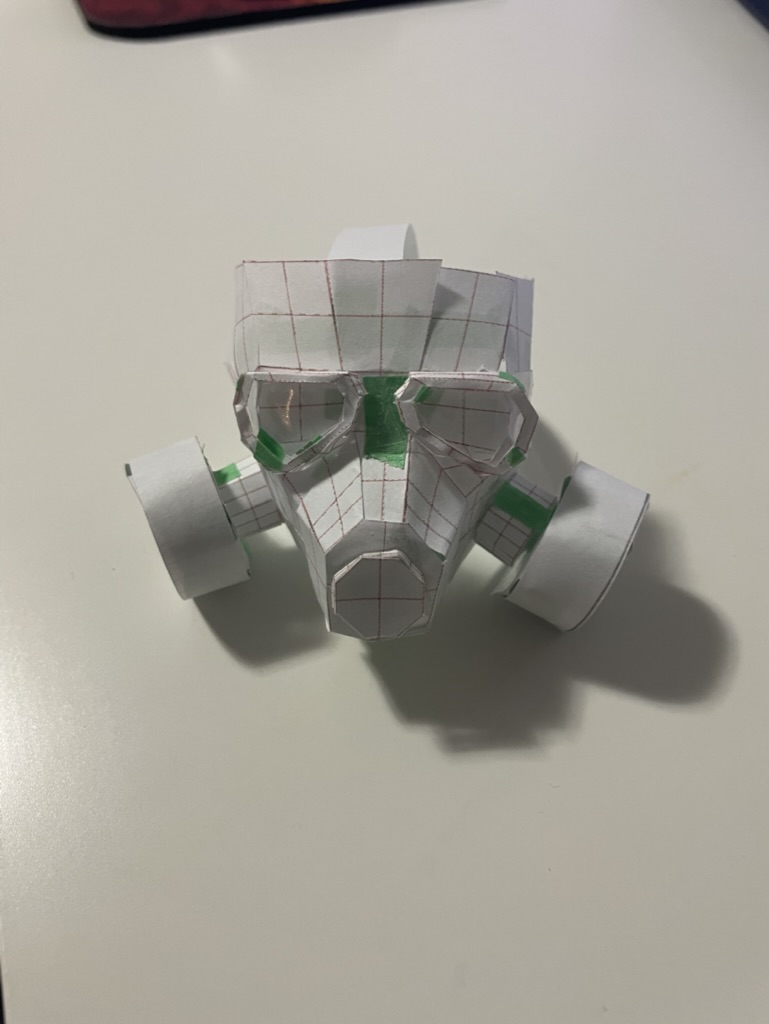


Using an exacto knife, I cut the printed meshes, and taped them together. For the most part, it all fit together perfectly, but I ran into issues with the chambers once again. It could perhaps be due to the size I printed my mesh (too small), but because there was difficulty unrolling, I believe I should rework my Rhino model with these problems in mind. Thus, for my sketch, I forwent the bezels and the indent of the chamber and instead made basic cylinders the approximate same size.


Depicted here is my papercraft model with a stress duck and ruler for scale.
Things I believe I should focus on for the next step:
- Fix chambers
-Make connection between chamber and mask smaller
- Plan designs and colours
- Figure out how to print meshes larger

Comments
Post a Comment